

We recently introduced the concept of quality steps in our blog. To make it more concrete and give you some ideas on how to climb up the steps, let’s discuss the different levels of reporting.
Disadvantages of the traditional ways of reporting
Laboratories who haven’t yet used Validation Manager may have tools that help them with the verification calculations. Unfortunately these tools don’t help much in creating the report. Verification reporting typically requires interpretation of all the data scattered in multiple Excels, transforming it into a presentable format, and copy/pasting selected graphs and numbers one by one to the final report document.
This takes a lot of time, and since everyone is quite busy, reporting is easily delayed by months. At that stage it’s not so easy anymore to remember what was really done and why, so explaining the reasoning behind the conclusions is often found very difficult. That’s why creating the report takes a lot of time. It may even feel like you just have to come up with credible content instead of really focusing on analysing your verification results. And once the report is finally done, it may end up in an email limbo leading to mixed document versions and lost nerves instead of constructive review and fast approval. And naturally, handling loads of data manually causes a risk of typos and other human errors in data management.
To survive the pressure of this absurd amount of work, many laboratories have created report templates to which the numbers and graphs need to be copied to. However, this may lead to people concentrating on only filling the template instead of drawing meaningful, clinically relevant conclusions. Also the numbers reported in such templates might not always be based on statistics suitable for the given case. A typical example of this is expressing bias in values whose relevance and justification aren’t fully understood. (We already introduced the misuse of correlation in our blog, and will get back to bias estimations in our next blog post.) Therefore, the report won’t give a truthful impression of laboratory quality.
Your lab may be creating templates with all the information about the methods, instruments, medical relevance etc., as if they were academic publications. There’s no harm in that. But when it becomes the norm, it just adds up to your work and takes away your time to focus on what’s relevant. You may find yourself just filling out templates instead of making well-justified conclusions of your verification.
Are you wearing yourself out with all the verification work? Do you have this uncomfortable feeling that the reports don’t give relevant information of your quality?
Producing reports easily with Validation Manager
Validation Manager helps you organize your time better when it comes to verifications. It makes interpreting your results easy, once you’ve done your measurements. When you’re interpreting and analysing your data in real time with your data gathering, if there’s a problem in your data, you will have good chances to deduce what has happened. And it’s also easier to gather more data if necessary.
Moreover, in Validation Manager you can easily write down your conclusions as soon as you have enough data for a specific performance characteristics. Juggling between Excel sheets and Word documents makes it difficult to document your result interpretation while you go. In Validation Manager on the other hand, the conclusions and questions and commentary are shown at the same place with your data. When you’re done with all the measurements, you can just review your results for the final conclusions and print out the report. No more time wasted on wondering what happened months ago. No more copy/pasting overwhelming amounts of content to your report.
Validation Manager also makes review and acceptance process easier. Instead ping-ponging the manual Word report via email, just ask the reviewers to check the verification in Validation Manager. You can sit down together to go through the results, or you can invite them into Validation Manager to review the report by themselves. If questions arise, most of the answers will be easily accessible as all the original data is available through the report pages. You won’t need the Word report before everything is ready for signing and archiving.
Can you guess what’s the main reason why some of our users still struggle with creating reports? They find it difficult to give up their old report templates that were created for a very different kind of use. To get themselves to Quality step 3 of standardized and automated processes, they usually need to change their expectations for the reports.
Here are some tips to make this change as easy as possible.
Deciding what you really want to get out of a report
When you construct your reports from Excel sheets and Word documents, handling large amounts of data is difficult. The tools you use restrict your possibilities in terms of what to include in one document, thus affecting laboratory reporting practices. Many laboratories report their verifications separately for each analyte and instrument. So if, for example, you have three instruments and each of them are running 100 tests, you’ll have 300 reports to create.
When using Validation Manager, you should start by asking what is the information you want to get from the verification. What is the final conclusion you would need to report?
A typical goal of laboratory verification is to conclude that an instrument or a line of instruments can be used in diagnostics. Therefore in Validation Manager, it’s usually most sensible to have one verification project to gather results from all the analytes and instruments that are being verified. Because when you combine data from different instruments and analytes on the same study, it’s easy for you to get an overall impression of their performance. And you can create a report that covers the whole verification of all instruments and analytes. You won’t have to write separate conclusions for each one of them if what you need is an overall conclusion that they are all ok.
Managing common content on the report templates
Standardized reports often contain introductory text and/or conclusion chapters that are nearly identical from one verification to another. There may also be some data tables e.g. to collect your keywords (like followed standards) that never really change.
To make things as easy as possible, have this text in your report template. If there are text parts that really need manual modification in the Word document, you can highlight them e.g. with yellow in the template. When you download your report from Validation Manager, all you have to do is to find these highlighted places and replace them with required content.
If you have different needs for different departments or e.g. for verification and validation reports, that’s no problem. You can have multiple report templates for different needs in Validation Manager. Just name the templates so that when a user creates a report, it’s easy for them to decide which report template to use.

Managing content describing the verification project in Validation Manager
Do you want to start your report with an overall description on what was done in this specific verification? Validation Manager offers quite many options for bringing this information from Validation Manager to your Word report.
The benefit of writing e.g. your project description in Validation Manager instead of the Word document is that you only have to write it once. Sometimes you may think that your Word report is ready, but later realize that you need to add data to some study. If you’ve edited your report in Word, you would need to copy those things to the new report version. On the other hand, if you’ve written everything in Validation Manager, you don’t need to worry about that. Just upload the required data into Validation Manager, and once the calculations are finished, you can print out the new report version.
Managing content describing an individual study in Validation Manager
Do you need to write descriptions of individual studies explaining what was done and why? In Validation Manager, each study has their own plan, where you can write this kind of information into the Plan info section. When creating your report in Validation Manager, make sure that your study plan summaries are included. That way your Word report will have all these texts, along with all key information about your study goals, tests, instruments, samples and sites involved in the study.
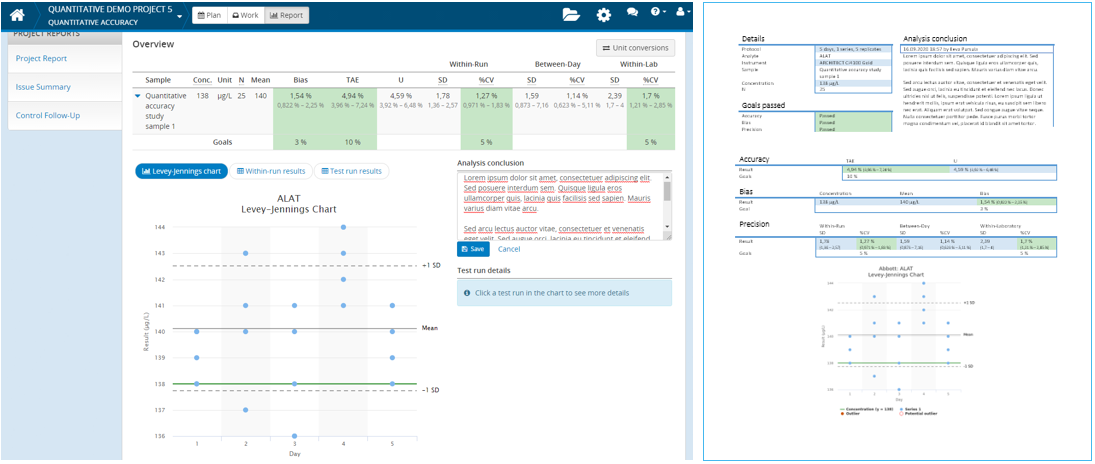
Writing your analysis conclusions in Validation Manager
Sometimes results need further investigation. Most of our studies enable writing your analysis conclusions on the study report. Even though we always knew that this feature would help our users in streamlining their verifications, we’ve been happily surprised how effectively our customers make use of it.
You can use analysis conclusions for documenting internal review rounds. Just instruct everyone to add their initials in their comments. This way your specialists from different fields (e.g. chemistry & clinical expertise) can easily collaborate in forming the conclusions on the quality of the verified tests. You can examine these conclusions in Validation Manager and print them out as part of the detailed reports.
In Validation Manager you can easily add into the report detailed results of analytes whose conclusions have been edited. That way you can have a compact table overviewing all the verified analytes, showing an overall performance impression of the verified instruments. The graphs and conclusions will be presented only for those analytes that require more attention, making it simple to find the reasoning behind the conclusions. Leaving out the unnecessary details of results shortens your report and makes it easier to read.
Using attachments and references to avoid copy/paste
Even if you really do need to create your report manually, you can avoid pointless copy/paste by attaching the report produced by Validation Manager for reference. Similarly you can attach other material such as specifications from manufacturer. Just write your conclusions on the main report and refer to attachments for the actual data.
The ultimate goal – no more paper reports
Those of our customers who are ready for Quality step 4 ask themselves, why print out the report when you can access it in Validation Manager? For whom and for what the paper reports are produced? What ultimate purpose do they serve?
If you already changed your processes to get all comments and conclusions for the report written in Validation Manager, then you can access them any time in Validation Manager. You and your accreditator can review the results in Validation Manager when needed. If there are any questions, it’s easy to dig deeper into the results to find answers. Verification projects can also be reviewed and accepted in Validation Manager. Then there’s really no need to print out your reports, as you can find them easily in Validation Manager.
This may feel like a distant dream, but what is really stopping you from turning it to a reality?
Accomplish more with less effort
See how Finbiosoft software services can transform the way your laboratory works.


